PAN Card Resizer Software: How to resize a photo or signature for a PAN card using the official website, specifically mentioning NSDL (National Securities Depository Limited) and UTS (UTI Infrastructure Technology and Services Limited)
NSDL Pan Card Photo Signature Resize

- Visit the Official Website: Go to the official website for PAN Card Photo Signature Resize
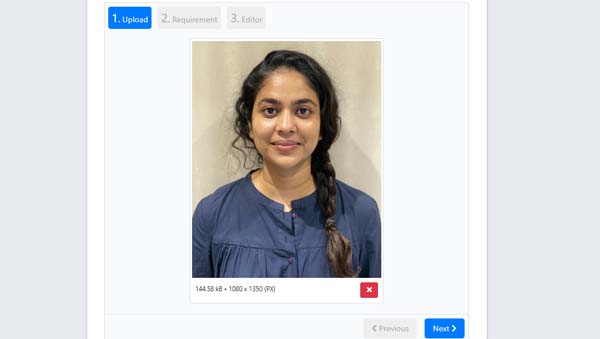
- Select File: Look for the “Select File” option on the website. This is usually the initial step to upload or change the size of your photo or signature.
- Choose Photo or Signature: Navigate to the location on your computer, laptop, or mobile phone where your photo or signature is stored.
- Click Next: After selecting the file, click on the “Next” button to proceed with the resizing process.
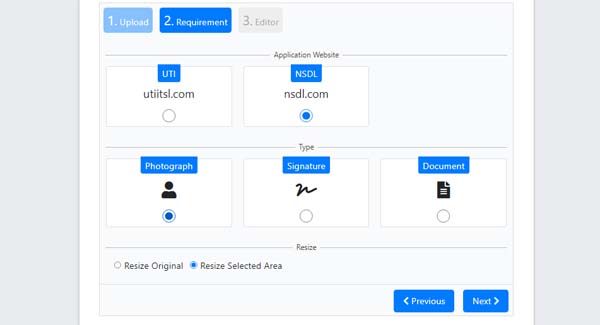
- Select NSDL or UTI: Depending on whether you’re using NSDL or UTI, choose the relevant option. For NSDL, select the NSDL.com option, and for UTS, choose the UTS option.
- Choose Photograph Option: If you are resizing a photo for NSDL, look for the “Photograph” option, and click on it to proceed.
- Click Next Again: After selecting the photograph option, click on the “Next” button again to continue with the resizing process.
- Review and Confirm: Review the resized photo or signature on the preview screen. If everything looks correct, proceed to confirm or save the changes.
Also, Check – CSC Stamp [Common Service Center Stamp]
Key Features of PAN Card Resizer Software

- User-Friendly Interface:
- The software should have a simple and intuitive user interface, making it accessible to users with varying levels of technical expertise.
- Resize Options:
- The ability to resize PAN card images to meet the specific size requirements set by different platforms or applications.
- Best Quality :
- Ensuring that the resizing process maintains the image quality and clarity of the PAN card, preventing any loss of information.
- File Format Compatibility:
- Support for various image file formats commonly used for PAN cards, such as JPEG, PNG, or PDF.
How to Signature Resize

- Visit the Official Portal: Go to the official PAN Card Resizer
- Select File for Signature: Locate and click on the “Select File” option to choose the signature file you want to resize.
- Click Next: After selecting the signature option, click on the “Next” button to proceed.
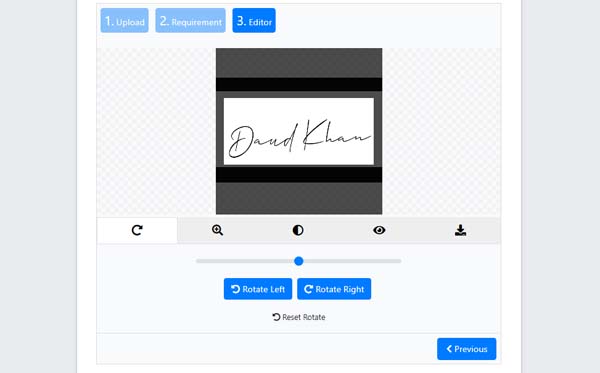
- Adjust in Frame: A frame will appear. Place your signature or thumb impression within the frame as required.
- Download Resized Signature: Click on the download icon to save the resized signature. Ensure the signature meets the specified requirements.
- Repeat for Aadhaar PDF: If you want to create a PDF size of your Aadhar card, you can do so on the same portal. Visit the document section.
- Select Document and NSDL: Choose the document type, select NSDL, and click on the “Next” option.
- Automatic PDF Creation: After clicking “Next,” the portal will automatically create a PDF file of your Aadhar card.
- Download PDF: Click on the download icon to save the created PDF file.
Now, both your resized photo and signature, as well as the PDF of your Aadhar card, are ready for uploading to the NSDL site or any other relevant platforms.
| Official Website | Click Here |
| Home | Click Here |
